Monday, September 17, 2012

The Paper Girls Challenge #16: Baby

The Challenge this time at the Paper Girls Challenge blog is make a page or project about someone/ something you consider to be your baby. Well here is another picture of Elliott when he was just two months old. Since I found this file of pictures I just had to use another one for this challenge. I remember taking this picture specifically with his little elephant toy that he loved so I could look at it and remember how happy he got when he played with it.

I used papers from a Studio Calico monthly kit from last October. I thought it would be appropriate to use up some of the stuff that I've been hoarding for over a year! I love the soft colors - even though I don't usually use them often. I did have to throw in some bright accents here and there. I thought it would be fun to use a Sassafras Lass journal card that just happened to have a 2 on it and an elephant to show his age at the time. One more thing to note is that my alpha didn't show up very well so I used a metallic gel pen and traced around the letters to bring them out more.

Make sure to head on over to the Paper Girls blog to see the other projects and to link up your own creation!

Sunday, September 16, 2012

A Masculine Card

I know, right??? Well my little brother just turned 30 so I thought last week, I'd better get on it! I've had this little pile of scraps on my kitchen table for at least a month from various projects. And I was thinking they are such cute papers it's a shame to throw them away. So I made this card pairing some fun mustard large polka dot print with some dark espresso teeny tiny polka dot print. I like the combo! I think the reason making cards for guys is hard for me is that I feel obligated to embellish more. But I had to force myself to stop at this because it really is enough.

Anyway I've been wanting to join it at Use it Tuesday's blog but just had the opportunity to get something done last week. And since this challenge is Anything goes well that made it a lot easier on me.  I haven't been busy or anything right? So my most hoarded item on this card is the stamp set by American Crafts called Sing Along. I bought it at the beginning of this year and this is the first time they've seen ink. I love the retro phrases and the old school radio. I'm going to count the scraps since I was able to use the pile up that was lingering for a month too.

Friday, September 14, 2012

Scrapbook Steals Blog Hop


Welcome to the Scrapbook Steals blog hop.  You should have come here from the Scrapbook Steals Blog page.  If not, head back over and start from there.  Don't forget to visit everyone's pages and leave a comment.  Scrapbook Steals will draw a name from all the comments to win a $20 Scrapbook Steals gift certificate.  Every comment is a chance to win! Comments will be closing on Sunday, September 16th at 11:59 PM MST. So make sure you go see all of the fabulous projects -- you wont want to miss any of them!

I had so much fun preparing projects for you for this blog hop. We were asked to make projects using Martha Stewart Glitters. I thought, this will be a snap! I had at least one idea lined up before I had the glitter in hand. Indulge me because I got carried away.  
This is an ATC swap that I participated in and I thought the clear Tinsel glitter would make pretty rain drops.  I used a glue pen, sprinkled the glitter on and tapped the excess off.  I love the extra little pop of shimmer.
Here is a close up shot so you can see the glitter better.

   
I thought I would think out of the box and show the glitter on a non-paper product.  Here's a couple of T-shirts I made for my girls using freezer paper, Plaid Fabric adhesive and the tinsel glitter.  I cut out a mask with my Cricuit on the freezer paper and then ironed it in place on the T-shirt leaving the area I wanted the glitter to show exposed.  I used a foam brush to paint on the fabric adhesive in a thin layer, sprinkled the glitter generously over the top and allowed to dry for 2 hours.  After I knew it was completely dry I shook off the loose glitter and then peeled off the freezer paper.

*Edit* Because of the questions in the comments, I thought it would be best to answer some of them here. After I knew the glue was all the way dry I heat set it by ironing the t-shirt on the back side set to the cotton setting and with a press cloth on the glitter side. Also, I wash the shirts inside out if I remember. And Low heat on the dryer is best. I don't always take so much care having four kids and all. BUT I did this two years ago with my girls and the glitter is still looking good. They were in need of a size upgrade and this was the perfect opportunity!

Voila! Here is a close up of the finished product.
Here is my lovely model showing off her new T-shirt.  I think she likes it!
Here is another T-shirt using a yellow T-shirt with the silver tinsel glitter.  I hope this gives you plenty of inspiration using the Martha Stewart Glitter.

Stop by Julie's blog next to see her gorgeous projects.


ScrapbookSteals

Wednesday, September 5, 2012

ScrapbookSteals Guest Sketcher: Rocket Age

 I was thrilled to be asked by Kristy Lee at ScrapbookSteals blog to be the guest sketcher for the Mid Week Mojo. I've been participating in the weekly sketches over there for just over a year and it has really helped me get so much scrapbooking done. I've always loved scrapbooking but this way I've been able to consistently get at least one page done a week.

When I found out that I would be working with October Afternoon's Rocket Age line I was so excited. I only had a few pieces of this line before but really couldn't find a great selection of it in any of the online stores. My favorite parts of the kit was the rubber charms (that I had to keep fighting Elliott for) and the Chip 'n Stick pack. They bring that extra dimension on a project that really takes it to the next level. I had to use the robot rubber charm for sure on the top page. Elliott is constantly pretending to be a robot in this laundry basket. I'm not sure if a day goes by where I don't find the contents dumped so he can play with it.

I decided to go with two pages in order to adequately show off the different papers in this kit. Here is Elliott with his favorite robot over the summer. It used to move its arms and walk but that lasted about three days.

Make sure you head on over to the ScrapbookSteals page today to get this kit. It's a one day deal and you don't want to miss it! And if you want to play along with my sketch make sure you go to the blog post to see it and find out how to link up your page.

Monday, September 3, 2012

Paper Girls Challenge #15: Go Big!

I'm this host for the latest challenge over at The Paper Girls Challenge. I had the idea pop into my head that it's been a long time since I've used a large picture in a layout. This particular picture I found while organizing the pictures on my computer. I can't believe the treasure I found. So many cute pictures and none of them scrapped!

I found that using the big picture really simplified the amount of embellishments I used on the page.
I was so happy to use up some of my stash of My Mind's Eye Alphabet Soup. I think it's a really cute line and the colors worked perfectly with the picture.


I needed a mat to go behind the main patterned paper but couldn't find the right cardstock. So I pulled out some of my color resist paper - retired Stampin' up - and used some of my distress stains to ink the edges. I love how easy it is to pull them out, add ink and be done.

Don't forget to go over to the main post for this challenge at The Paper Girls Challenge blog to play along and see the other team member's creations!

Sunday, September 2, 2012

Paper Girls Challenge #14 Get Messy

First off this post is late for the challenge but I wanted to show the technique that I used to mist the chevrons on my page and my card so I hope people don't mind! Again, this challenge was inspired by something I saw on Pinterest. If you want to check out the inspiration pin here it is. The tutorial I came up with is below. As a side note about this particular page I planted my peony bush three years ago and it finally bloomed! What a relief! I was beginning to think I planted a dud or that I was doing something wrong.

Because I always feel compelled to experiment with a technique I had to try a different method to make this card. Instead of painting and then masking off- I just masked with the washi tape and then spritzed. Fair warning if you use this method keep in mind that if you mist heavily don't pull the washi tape off until your cardstock is completely dry. For this card I used Mr. Huey's Opaque White and October Afternoon Sprinklers in Icebox.

Tutorial Time: Misting and Masking with Washi tape

You will need a few basic supplies. Washi tape, acrylic paint, and some misters in at least two colors.
 Also, you will need to choose your canvas. I used a piece of watercolor paper because I figured that would stand up to a heavy inking and all of the paint I planned on using.

 First, spritz your paper randomly with the spritzers. Make sure to put your paper into a box with tall sides to protect your surfaces. Then let your paper dry completely before moving on.

 Second, start masking off your chevrons with your washi tape. Next time I don't think I would use the Smashbook tape (black and white polka dot). It's a little more papery and was harder to remove. Match up your points carefully.

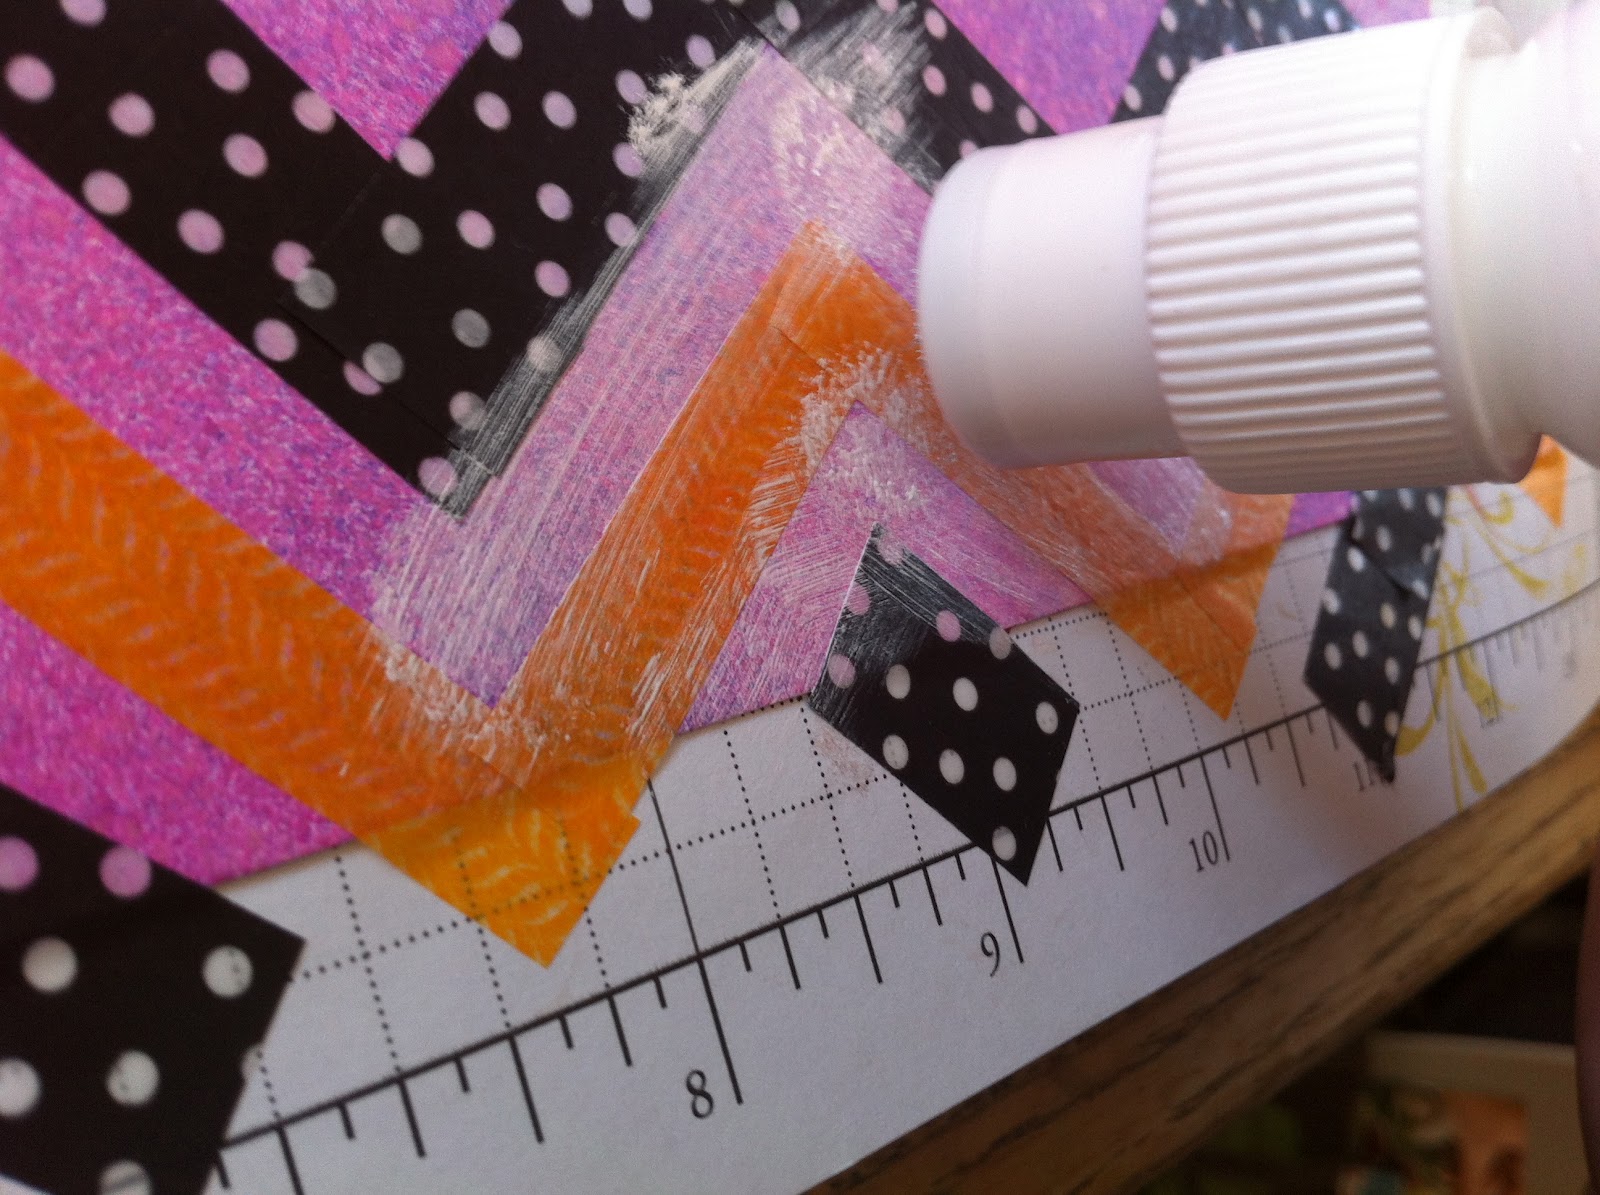
 I took this picture to show that you should keep the chevrons going of the page to keep the continuous look of the pattern.

 Third, I used a paint dabber to start adding the white back onto the paper. I had to do several thin coats of paint and let them dry in between. Honestly next time I think I would just use a paint brush and a bottle of paint for this technique.
 Fourth, add more paint. Then some more. I think this magenta color is hard to cover completely.

 And last step, when the paint has dried completely start removing the washi tape. It was so satisfying to reveal! I loved the handmade look and the imperfections!


 Here is a view of what I did with the card. I just masked the kraft cardstock and then spritzed. As you can see the washi tape gets really wet with this method. Once you know the cardstock is dry then you can blot of the washi tape before removing it.

 
I just couldn't stop with the chevrons! I ended up doing my nails too! Here is the pin on Pinterest where I found a tutorial of how to do this. Make sure your bottom coat of nail polish is really dry before adding the next color. What can I say? I'm a Pinterest junkie!