

My friend Misty reminded me of the time we experimented with stamping with bleach. There are several approaches to do this but one of my favorite is what I did on this page.
First you brayer your background color onto a piece of white cardstock. I like the whisper white card stock that Stampin' Up makes because it's buffered which means it has a very smooth surface. I chose one of the new In Colors: Island Indigo. It's a nice deep blue with some green tones. The stamp I chose is called Ornate Blossom. It works good for this technique because it is a bold stamp, very few fine lines that could bleed too much.

The next step will be to have some sort of non-reactive tray with a folded paper towel to make a little bleach puddle on. Make sure to work in a well ventilated area and protect your surfaces.
You'll need enough bleach on the paper towel to be damp without being dripping wet. When you stamp your image on the paper it removes the ink that was brayered on. Depending on the ink you use there is a lot of variation, which I love. After you are done stamping remember to rinse your stamp with water then clean it with a conditioning spray such as the SU Stampin Mist.
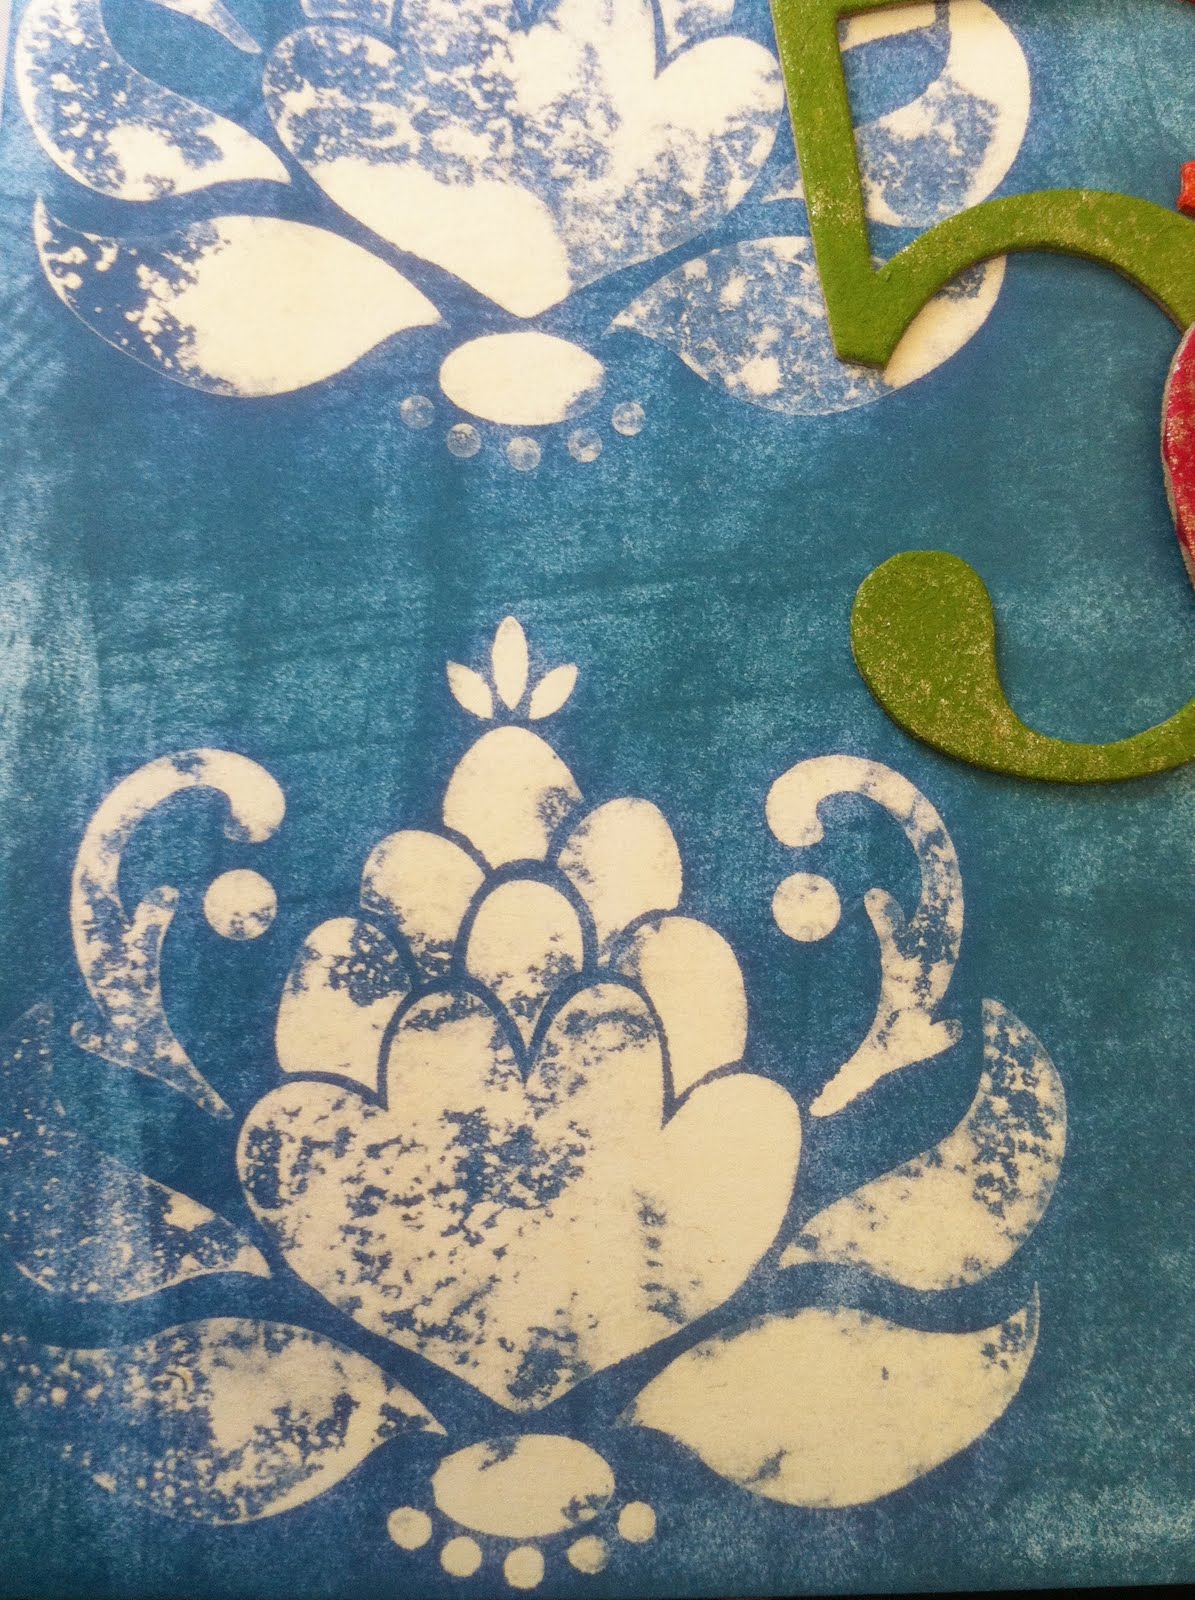
Here is a close up on one of the places I stamped. What I love is the color variations you get from the chemical reaction. The ink surrounding the image changes a little bit turns a little more blue. FYI: after the bleach dries it becomes inert so it won't damage your scrapbook pages over time. Just make sure you let it dry completely before placing anything else on your page. The drying process can be sped up with a heat gun at least 10"in away from the page so it doesn't get too hot.

Another close up of the final page. I hope this inspires you to try this fun technique!
Supplies:
Ink: Island Indigo (SU)
Card stock: Whisper White, Melon Mambo (SU)
Chipboard: Basic Gray painted with acrylic paints & sponged with Champagne Mist shimmer paint (SU)
Stickers: Glitz and Glitter
Journal Spot: My Mind's Eye
16 comments:
Thanks! I can't wait to try this!! :)
Thanks E! This is great!
Love this!!!!!!!!
This is awesome! Can't wait to try it!
This is really neat. Thanks so much for the tutorial!!
WoW! that was absolutely awesome.. gonna try it.
so interesting!
Can you use this same technique for clothing?
You could use this technique for clothing if you used a gel bleach pen instead.
is the Ornate Blossom stamp still available?
It sure is! It's on the clearance rack so grab it quick.
Im sorry, But I looked on the Stampin' up website in the Clearance section. And I didn't see it. Would you look again to see if it is actually sold out, or am I just missing it?
I searched it Sunday and it was coming up but I was looking on my phone. It could have been a cached page. However I did find several on ebay by searching "Ornate blossom Stampin Up". Good luck!
Hello Erica
What a wonderful technique ! I was wondering if you could wash the fabric once the bleach has dried ? Or would it "melt" the whole pattern ?
I would wash the fabric as soon as it reaches the bleached effect you want. If you leave the bleach on too long it will decay the fabric.
BTDT with the dacay on fabric. You need to rinse it in a vinegar/water rinse or it will definitely self destruct as well as hold on to its odor.
Post a Comment